
 SOLID와 SPRING BOOT의 조화
객체지향 5 원칙이라해서 프로그램이 견고하며 고치기 쉬운 상태가 된다는 뭐.. 그런 거다. 그런데 이 원칙을 막상 실제 프레임워크를 이용하는, 예컨데 스프링 부트에서 적용하려고 한다면 막막하거나 그런 코드를 본 적이 없지 않은가? 나는 이런 느낌을 이벤트 관련 서비스 개발을 맡았을 때 느꼈다. 첫 번째는 기간 내 1회 참여였으나 이후 1일 1회 참여도 가능하냐는 요건이었다. 처음 코드와 테이블 설계 자체가 기간 내 1회 참여였기에 곤란하다는 느낌도 있었다. 하물며 2가지 요구사항이 시간을 두고 들어와서 기존 코드를 고치는 데 겁이 났었다. 하지만 이 문제는 간단하게 Api의 로직 내 If문 추가로 끝난다. 그 이후 요건이 또 들어왔다. 원래 이벤트 참가 시 참가 기록 및 쿠폰 발급이있다. 새로운 기능인 ..
이전 글: https://koolreview.tistory.com/121 Spring DI 방법론https://susuhan.notion.site/Spring-DI-6113d9eefba446c99413d1323abe9276 - 이쁘게 보기 - Spring DI 방법론 글의 목적 필드 의존성 주입과 setter 의존성 주입, 생성자 의존성 주입에 관한 차이를 알아가기 susuhan.notion.sitkoolreview.tistory.com 예전에 DI에 대해 정리했었다. 그런데 회사 내에서 인터페이스를 사용하지 않고 있었다. 실제 Class만 이용해서 구현하고 있었다. 그런 이유는 하나의 인터페이스에 하나의 구현체만 존재하는 일종의 1대 1 구조로 되어 있는 경우가 많았기 때문이었다. 인터페이스를 쓰는 ..
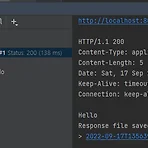
캐시 전략은 클라이언트와 서버에 각각 적용할 수 있다. 중요한 점은 서버에 I/O Call를 발생시키지 않아야 좋은 것이다. 서버에서 Redis나 Ehcache 활용하거나, 아니면 DB 수준에서 캐싱을 사용하든가 등등 서버단에서도 지원할 수 있는 방법은 많다. 하지만 중요한 건 사용자가 Call를 요청의 수가 적으면 서버단의 CPU를 쓰지 않을 수 있다. 그런 기법의 예로는 디바운싱도 있다. 디바운싱은 화면의 UI를 변경을 억제하는 데 쓰일 수도 있지만 Call을 여러 번 쏘지 않도록 유도할 수도 있다. 클라이언트 단, 아니 Http Cache에 대해 소개해보려고 한다.우린 결국 Http Call를 무조건 요청한다. 이는 Html, css, Js 등 모든 리소스를 받을 때 모두 통용된다. 이런 Http ..
Spring Boot를 이용해서 개발을 진행하면 @Transactional이란 어노테이션을 이용하여 데이터의 영속성을 지키고자 한다. 제대로 알고 사용하는 것일까? 프록시조차 모르는 나는 Spring Boot의 의도에 대로 비즈니스 로직에만 신경을 쓰는 것이었을까? 오늘은 그저 사용 중이었던 @Transactional에 대한 내 생각을 서술한 글을 쓴다. @Transactional을 제대로 이해하려면 유튜브 뉴렉처 강의가 직관적이었다. Spring 자체를 이용해본 적이 없기 때문에 Bean을 xml에 직접적으로, 프록시를 직접적으로 설정해서 AOP를 구현하는 것을 본 것이 이해가 잘 가는 부분이었다. https://www.youtube.com/watch?v=y2JkXjOocZ4&t=2s 문제는 그 다음이..
타임리프를 사용하다보면 자바 컨트롤러에서 던져주는 model 객체 내 값들을 JS에서 쓰고 싶은 욕구가 생긴다. 왜냐하면 Js에서 어떤 작업을 해야 하는데 필요한 값들이 페이지 내에 존재하는 경우가 많고, 이를 HTML 태그에서 갈무리를 해서 써야 한다. 그러면 document나 Jquery를 이용해서 HTML 내에 값을 가져와서 사용한다. HTML 내 태그에 값을 숨겨 놓고 그것을 가져다 쓰는 작업이 꽤나 귀찮다. 애초에 JS 변수 내에 값이 있으면 해결되는 문제가 아닐까? 그렇게 하는 방법이 있다. package com.example.kg; import org.springframework.stereotype.Controller; import org.springframework.ui.Model; imp..
https://koolreview.tistory.com/127 Spring Boot Security 5 - Oauth2.0 구글 로그인 (HTTP BASIC 탐방) - 1 단순하게 Spring Boot Security 5에 대해 코드만 작성하는 글이 아니라, 이해를 위한 글을 작성하기 노력하고 있습니다. Oauth2.0을 알아보기 전에 기본인 HTTP Basic 로그인에 대해 알아보겠습니다. 1. 종속 koolreview.tistory.com 이전 글에서 HTTP BASIC 로그인에 대해 알아보았습니다. 이번에는 HTTP OAUTH2.0로그인에 대해 알아보겠습니다. 1. 라이브러리 추가 implementation group: 'org.springframework.boot', name: 'spring-bo..
 Spring Boot Security 5 - Oauth2.0 구글 로그인 (HTTP BASIC 탐방) - 1
단순하게 Spring Boot Security 5에 대해 코드만 작성하는 글이 아니라, 이해를 위한 글을 작성하기 노력하고 있습니다. Oauth2.0을 알아보기 전에 기본인 HTTP Basic 로그인에 대해 알아보겠습니다. 1. 종속성 추가하기 먼저 종속성을 추가해줍니다. 기존 프로젝트에 시큐리티만 추가하면 됩니다. lombok은 코드를 간편하게 쓰기 위해 추가했습니다. dependencies { implementation 'org.springframework.boot:spring-boot-starter-security' implementation 'org.springframework.boot:spring-boot-starter-web' compileOnly 'org.projectlombok:lombok..
Oauth2.0에 대해 작년에 아무런 지식없이 인터넷을 방황하며 코드를 작성했었다. 당시 Nestjs로 작성했었는데 이제는 다른 프레임워크로 작성해야했다. 이번에는 스프링 부트로 oauth를 이용하려고 하고 라이브러리를 찾아본 결과 시큐리티 5에 있는 oauth2.0-client를 이용했다. 어려운 부분은 크게 2가지였다. 1. 트위치 Oauth에 적용하기 2. Oauth2.0에 대한 지식 해결했던 방법 1. 트위치 Oauth2.o에 적용을 해결했던 방법 카카오와 네이버도 스프링 Oauth2.0 라이브러리에서 제공하는 기본 제공자가 아니다. 이 두개의 적용 방법과 트위치 개발자 페이지와 검색을 통해서 해결했다. spring.security.oauth2.client.registration.twitch.cl..